It’s funny how you see something and then your mind goes off on some sort of tangential shift. I have a chain across the bridge at Hobbit Hollow so I have to get out of the truck to undo the lock to get over the bridge. When I got out of the truck I noticed a tiger lily. Which I have never noticed before at the site.When I left later on I kind of noticed that there seems to be an extraordinary number of tiger lilys in our town this year. I don’t know if it’s all the rain we’ve had or what? Maybe something happened last year? I don’t know but this flower was really beautiful and it got me to thinking of gardening and our old friend Samwise Gamgee from the Hobbit. We’re definitely going to need a gardener. Sometimes you really do have to stop and smell the lilys.Here’s a picture of the flower.

Oh yes where was I. So much to tell you about and so little time.
During the week I had the crew take care of a few things and prep the sight for the wall steel installation. We finished putting in the wall ties fixed some of the pins and did a few miscellaneous chores. I didn’t get a picture of it but some of the pins for the Symmons forms have to go in a certain way. Once the concrete gets poured the form ties go into tension and the pins tighten up. If the corner pins aren’t put in in a way that you can hit them out they are very hard to get out. The frustration factor can be substantial especially on a hot day.
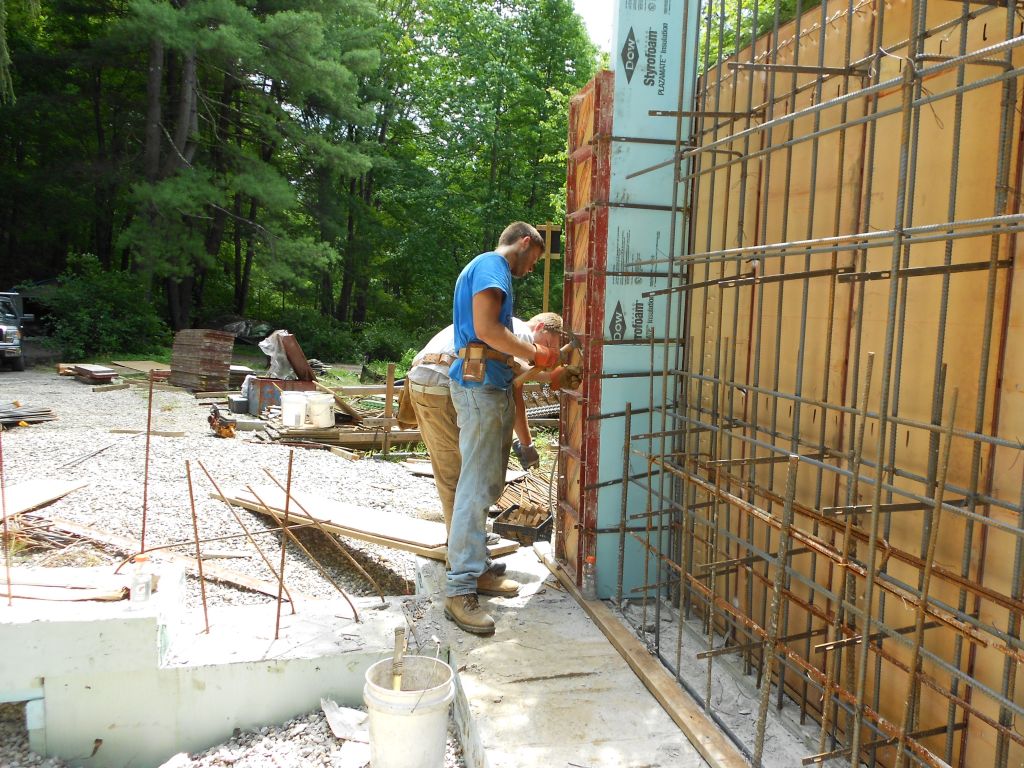
We came in on July 4th because I had the day off and we worked from 8 till noon. One of the main things I wanted to accomplish was to set the grade and slope of the retaining walls on the sides of the hobbit house. It’s a little tricky because you kind of have to visualize how you want the house to look when it’s completed. Where you want pathways to be,where a stone retaining wall might work well and so on. I hope I got it right. After I snapped the grade in I had Jude cut back the rebar so the rebar will be below the final grade. It’s actually pretty hard to do what he did.Here’s a picture. You can see the final grade snapped on the wall if you look close.
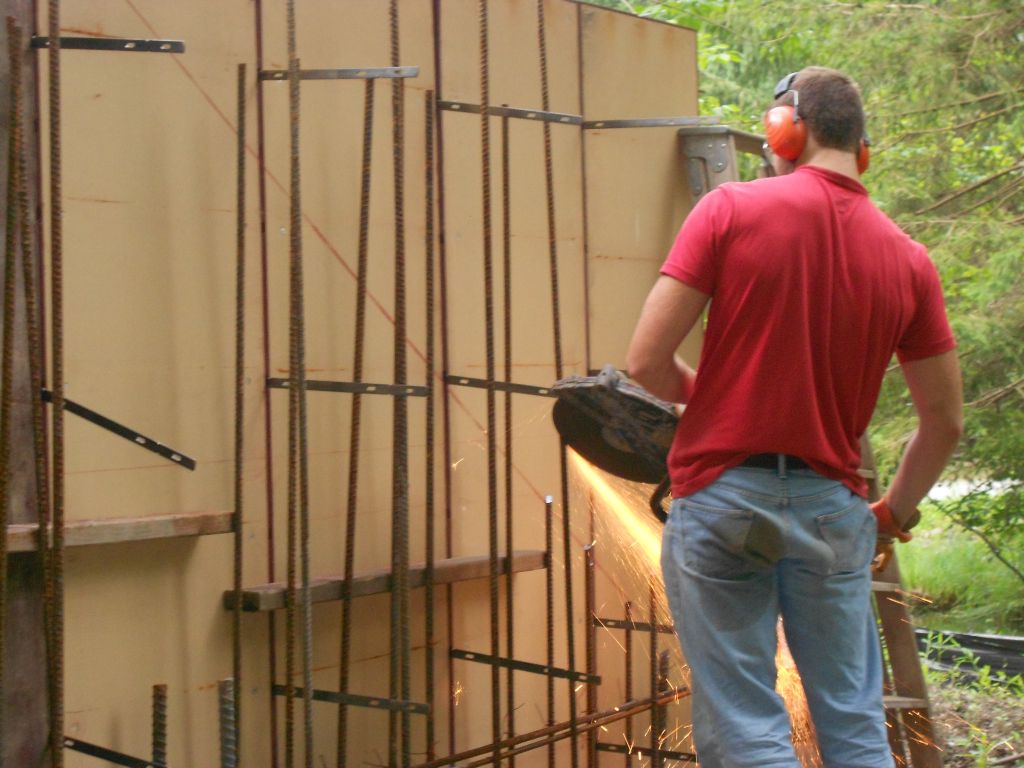
When you cut rebar at an angle like Jude is doing it gives the rebar a super sharp edge which is extremely dangerous. I’ve seen some really bad cuts from rebar that has been cut like this. I’m not sure but it looks like Jude’s ass is wet.
Another item I wanted to show you is some of the equipment and material we use to add in additional rebar in spots where we might have missed it.
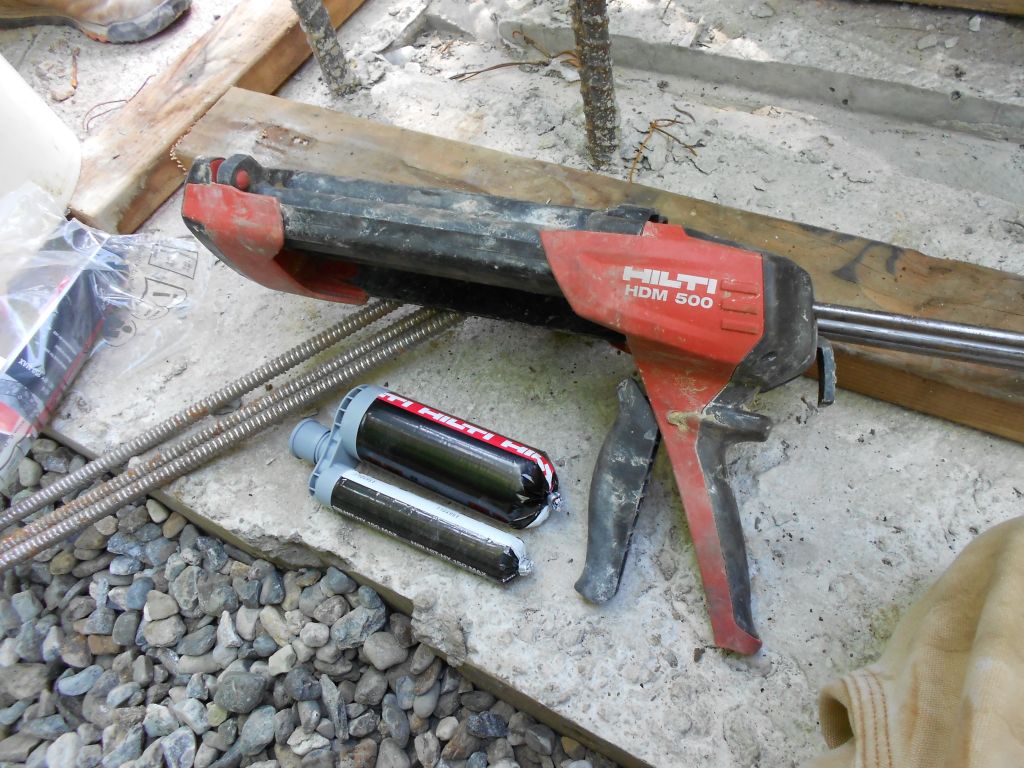
Once you drill a hole into either the concrete or rock you blow or vacuum the dust out of the hole and you use this epoxy to glue the rebar in place. Very convienient if you’ve left rebar out or the inspector decides he doesn’t like what he sees.
I hope you haven’t forgotten that a Hobbit house is a passive house,right? So one of the elements that is critical in a passive house is there cannot be any thermal bridges in the exterior envelope of the house. So what you see in the next picture is the thermal barrier installed at the exterior face of the building. What this does is prevent the exterior concrete that will be exposed to the weather and the hot and cold cycles to pass its temperature into the concrete on the other side. Check it out.

I’m sure you’re wondering why the insulation is way higher then the forms,right? I’m not going to tell you. I’ve changed my mind. It will have to wait for another post .You’ll understand it better with an accompanying picture that I have yet to take. A picture is worth a thousand words right? And I type slow so it means a lot to me. You can’t see it here but this insulation is directly over the thermal break insulation that I installed in the footing. This is super important for the passive house aspect of this house. Did you see the tree branches on the ground there? The pump truck broke them off during the footing pour. I can’t believe that is where I put them. I don’t know what I was thinking.
Remember the shear key? It was the 2×4 I had wrapped in plastic in the footing pour. The shear key helps “Lock” the wall concrete to the footing concrete. Maybe this picture will help you understand what it does. I had wrapped 90% of the 2×4 shear keys in plastic. I kind of rushed at the end with the last couple. I wished I hadn’t, the ones I didn’t wrap with plastic had to get chopped out with a chopping gun. An ounce of prevention is worth a pound of cure,right.

So lets get into Saturday!
I had a friend of mine from work who is a wire lather come up to help me tie the rebar in the walls. His name is Leary and he is originally from Jamaica. He owns some property down there and says he’s going to build a place on it someday so he can retire there. Sounds like a plan. I told him I’d give him a hand. Now that’s what I call a working vacation. Anyway wire lathers place and tie the rebar on reinforced concrete jobs and Leary is an ace. I got there early,around 5:30AM and started to get a few things set up so we could go right to work when he got there. He’s from Long Island and had a pretty long drive up to the site. I really appreciated him coming up to help. We got so much done it was unbelievable.
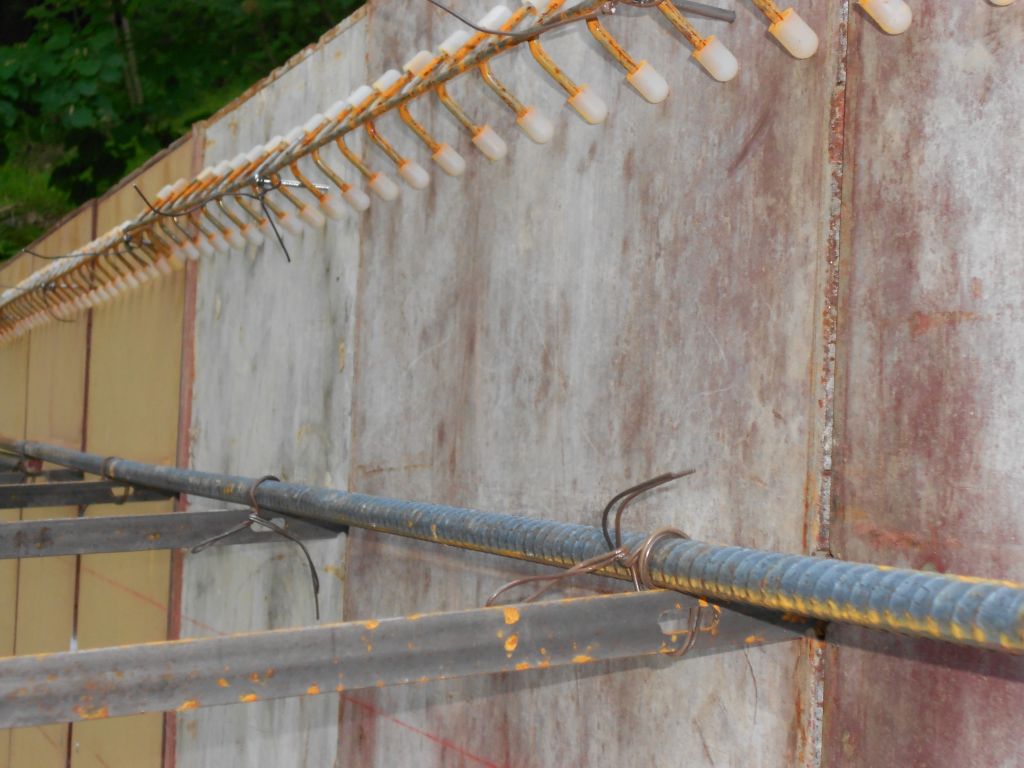
Anyway, I showed him what I was thinking as far as setting up for the rebar and what I had set up wasn’t going to work so well so we decided to change it. I was thinking we would use the beam chairs shown in the picture below to tie the steel to but Leary said that the nails will pull out once we start tying the steel to it. He was right so we tied a set up bar right to the form tie and tied the verticals right to the setup bar. Here’s the picture.
Once we had that set up we began the vertical rebar installation on the back face of the wall. It was a three man team.One guy walking the steel in, two guys placing it, and then one guy holding it steady as Leary tied it. Now these are twenty foot number five bars at 6 inches on center so it was a pretty serious endeavor. Once everyone got a hang of the system it ran like clock work and they started to motor. ..or Rock and Roll as we say in the States….I think they say it’s Irie in Jamaica. Here’s a picture of Leary,Jude and RJ doing there thing. Yeah mon!


So while these guys were doing that I was setting up the other wall for them. There were over 200 bars for them to install so I had a little time.Once I had finished that I started the interior vertical layout which consists of #5 rebar fourteen foot long at 12 inches on center.We used a U-bar to hold the correct spacing on the bars which worked out great.(Sorry I forgot to take a picture) Leary showed me how to set it up. Once we had a couple of set ups done we “snaked” in the horizontal bars and tied them in place. The horizontal bars were #5’s at 18 inches on center. It was a lot more work than I thought it would be. But once I had the first twenty feet done I started to put in the 14 footers which went in pretty quickly.
Once I had about 10 feet of verticals in I had Kevin and Ethan start closing up the wall forms. It takes a little getting used to but once you get the hang of it it’s a snap.If you look closely you can see the setup u-bar we used to set up the outside face of the wall. Upper left corner.
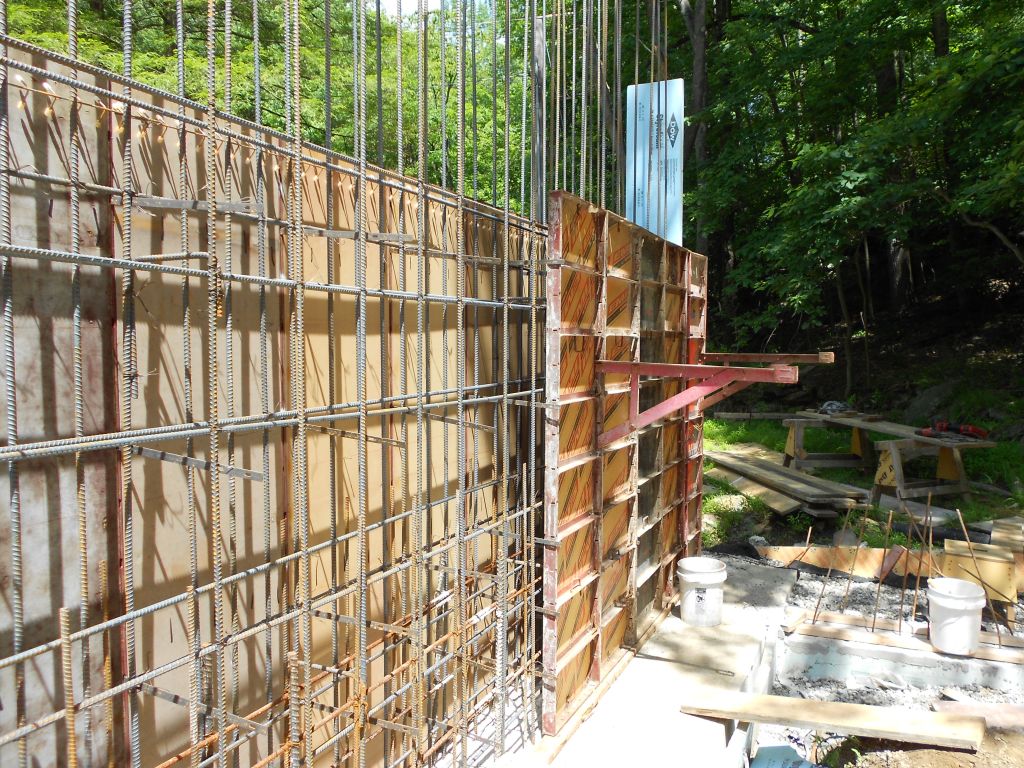
Those things haging off the wall are called scaffold brackets. Once all the forms are up you place planking across them so you can pour the concrete from a comfortable position. Of course I cracked my head into one of these while I was walking by and man did it hurt. I thought I might have gotten cut. Luckily I didn’t.
Once Leary was done with the heavy verticals he started working on the East wall setup bars and horizontals. This freed up Jude so I put him and Ethan on wall panel close up and had Rj and Kevin did some miscellaneous Symmons forms stuff.
A couple of things are important here. One is that the corner form is plumb. If it isn’t you use a nail or a Symmons form pin underneath the bottom corner of the form to plumb it up. The other thing in this particular picture is the extra ties we added at the insulation. What we don’t want to have happen is the insulation to move or snap when the concrete starts to push against it. You try to pour the concrete evenly on both sides of the insulation when you do pour but it isn’t always that easy. I’m also going to add another tie 6 inches from the bottom here. That’s where the pressure will be the greatest.
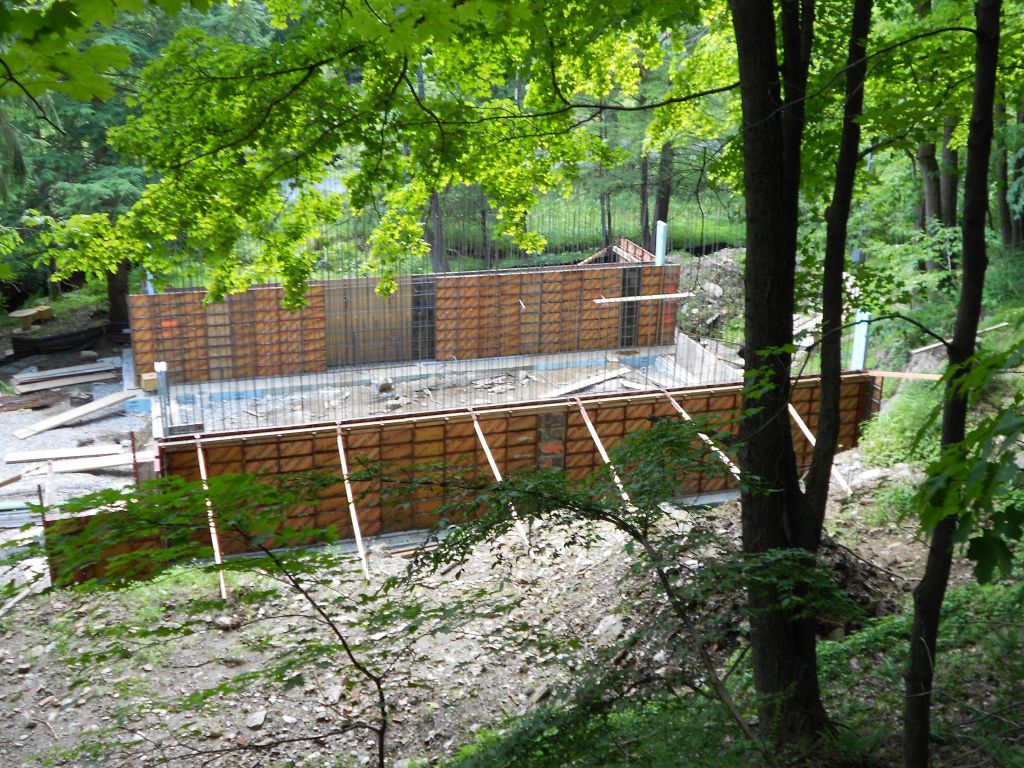
Here’s a couple of more pictures taken at the end of the day Saturday.

Impressive…..Most impressive.
We worked 8 till 2:30 Saturday. It was like 92 degrees out and man was it hot in the sun. The sight is really nice out in the morning on a hot day.It’s pretty much 100% shade till noon. But the afternoon is total sun. The boys held up remarkably well under the conditions. They worked hard all day. I’d just like to thank Leary and of course the other guys who gave up their free time to come and help me. It means a lot to me. They will all get a free weekend stay at Hobbit Hollow when it’s completed and ready for business.
Did we get a lot done or what? 200 #5×20′ verticals, 100 #5×14′ verticals, 60 #5×20′ horizontals…and wall close up to boot. An awesome day …talk to you next week.
Jim
Someone necessarily assist to make critically posts I might state.
This is the very first time I frequented your web page and up to now?
I surprised with the research you made to create this particular publish amazing.
Great job!
Dear New York:I’ve never talked to a city vacation before but I really appreciate you leaving a nice comment. I hope you continue to follow along on this journey. I also tried to click on your underlined name above but didn’t get a response. Part of my dream is to use New York city as part of a marketing plan for people to come and stay at this house when it is completed.(You know: Hey, if you’re visiting Manhattan take I ride upstate and visit my Hobbit House for a day or two!) Thanks again for writing.
Take care,
Jim
I just came upon your blog today through the tiny house blog.
I love your hobbit shed and I have lots of reading to do to catch up with your hobbit house…very cool!
Thanks for sharing 🙂
Well thanks for leaving a comment, Jodi with an i.It’s the same way my wife spells her name. I hope you enjoy the blog and follow along on my unexpected journey! Thanks again!
Jim