Against the power of Mordor there can be no victory.
We must join him Gandalf……… We must join with Sauron………It would be wise my friend.
Gandalf replies: Tell me, “friend,” when did Sauruman the Wise abandon reason for madness!?!?!?!?!
Yes my friends, reason for madness? It has been said of me from time to time. Yet hope remains, while company is true.
…And the true have returned to this little old place we call Hobbit Hollow. For the reason is simple. Hobbits are simple folk. You can learn all that there is to know about their ways in a month, and yet, after 100 years they can still surprise you!
I kind of like to think I’m full of surprises. Well that may not be true….but I’m usually full. Anyway, thanks for stopping by again as always. So let’s get right into it. Fill up your pipe with some Longbottom Leaf and learn about the ways of building a Hobbit House. Follow me.
…And let’s just be honest here Jim it really has been a while since we’ve gotten much done. Well, there have been some extenuating circumstances of late. Like this horrible frigid winter that has been going on since mid January.
This week I got a little lucky. Or was I? As Obi-Wan would say, “In my experience there is no such thing as luck.” Regardless. We didn’t put the crane up on 58th street again this weekend. The building department wasn’t happy with the maintenance records for the crane when it was in operation in California. So we’re going to have to use a different crane. Not sure if they’re going to have this one ready to go for next weekend either. Time will tell. But I was off this weekend!
And as far as luck is concerned I was lucky to have Ethan home this weekend. So not having to put the crane up allowed me to work with my two sons Ethan and Terence. We gave it a really good shot as well. So let’s start at the beginning.
Well for those of you not from around these parts the first day of spring was this past Friday, the 20th of March. Mother Nature blessed us with about 5 inches of snow. So the whole Spring thing is starting off with a bang. Anyway as you all know I wake up early for work. Usually at 4 AM. So Saturday morning I was thankfully able to sleep until 5:30. I had the snow plow on the truck and headed over to the Hobbit House to clear the snow and take a look at my situation for the day ahead. Snow removal wasn’t bad. It was predicted to get into the 40’s by the end of the day so I was really looking forward to getting something done for a change. I picked up a banana on the way home. You know for a banana pancake, of course! It’s the little things in life that help you get by. For me one of those little things is my Saturday morning pancake. Jim, nobody really cares about your pancake issues. The short version is the Editor had waffles in mind. So I had a waffle instead. I don’t know what it is about waffles but I can never eat a whole one. I guess the guy who invented the waffle iron had a big stomach.
So Ethan, Terence, and I headed over to the house around 9:45 and got started. Fortunately Ethan and his friend Egzon worked Friday at the house. They finished the last layer of styrofoam, cleaned up, and installed 90% of the rebar in the walls.Yes, my friends, rebar in the walls. A picture for clarity if you will Jim.

What’s this all about? Okay a quick lesson in Hobbit House structures. Let’s talk first about what we are doing and then we’ll talk about why. What we are doing is tying the two perimeter walls together. We epoxy these short rebars into both walls and then splice those little short pieces together with longer pieces of rebar. The procedure goes along these lines. Using a Hilti hammer drill, TE76 or equivalent, drill 3/4 diameter holes in the wall at 12 inches on center. At least 6 inches into the wall. (I had Ethan drill in 8 though.) Once this is done you have to clean the hole you’ve drilled out. This is super important. What we are creating is a structural element for this house. So the epoxying or”glueing” of the rebar into these holes is a really big deal.
How do we do it? Well you get your handy dandy Hilti products and go to work. First you blow out the hole with what we call a blower. This gets 90% of the concrete dust out. After that you take a wire brush and ream the hole out to loosen up any loose concrete dust that is still left inside the hole. Once this is done you blow it out one more time and you are good to go. Check out the tools of the trade.
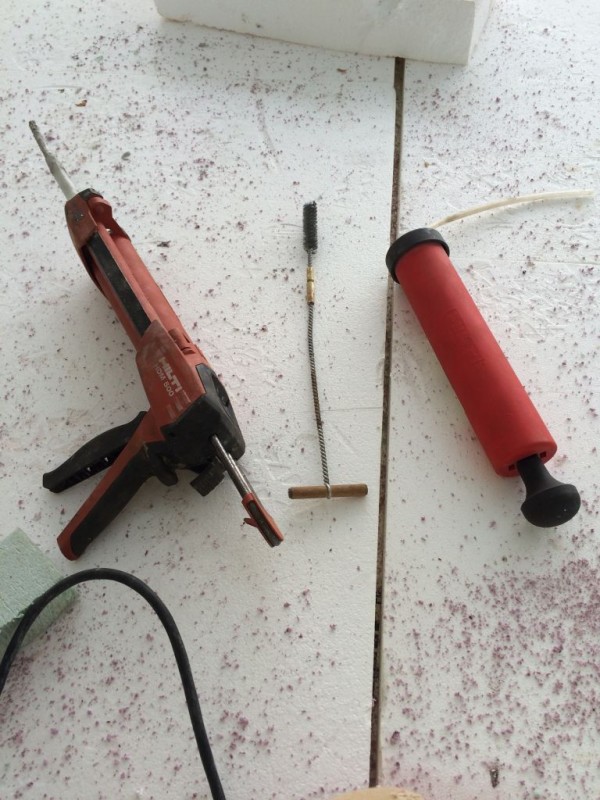
Now you get your Hilti HY-200 epoxy and load your dispenser with a tube. This is a two part epoxy. It comes in two packages that are connected with a mixing nozzle. When you pull the trigger on the epoxy gun and it starts to go through the nozzle it mixes the epoxy in the correct proportions. So basically what you do is put about 6 squirts of epoxy into the hole you are working on. Then push the rebar into the hole slowly while twisting it a bit. Air gets trapped inside the hole while you are doing this so it feels a little weird. Like something is working against you. After that I pull the bar out of the hole and make sure it is fully coated with epoxy. Then I add about 4 more squirts of epoxy into the hole and push the rebar in for good. You have to make sure epoxy oozes out of the hole a bit. (If you look at the first picture you can see what I’m talking about.) This way you know you have 100% contact with the rebar, epoxy, and the concrete. Once this stuff sets up it’s forever. If you tried to pull the steel out of this hole the steel would strech and deform before it pulled out of the epoxy. Or a whole chunk of concrete would come off at the end of the rebar. That’s how strong this epoxy is.
There were a few holes left to go that Ethan had trouble getting done so I had Ethan drill and Terence epoxying the bars in.Here they are.

If you look close you can see he has drilled a bunch of holes right next to each other. There must have been a horizontal rebar in the way at this location. He eventually found a spot where the drill would go deep enough.

You can see all the concrete dust on the styrofoam. You’ll also notice that Terence is wearing a heavy duty respirator. Concrete has scilia in it which is dangerous to breath in. I think I might get those really cool full face mask respirators that Walter White and Jesse use in the hit show Breaking Bad. Maybe on the next Hobbit House we build. Anyway make sure you are using the proper protective gear when you are dealing with concrete dust.
So why is this so important? Well just picture a wooden framed house roof. The two roofs on the front and the back of the house meet at the peak right? Right. As the weight of the structure settles and a snow load is applied the roof wants to spread apart at the bottom where it meets the vertical wall plane of the house. This load will push the outside walls away from each other and you could potentially have a roof collapse. (There were actually quite a few of these in the Boston area this winter.) What holds the exterior walls from spreading apart in a wood frame house are what they call collar ties and or ceiling joists. These ties or joists are nailed to the rafters and go into tension as they are loaded with weight. That is what helps keep your house together. The same thing holds true for our Hobbit House. That rebar will go into tension and will hold the two exterior walls from pushing out. It’s really that simple. We’re just doing it a little differently. (The Editor’s eyes have glazed over and my children are wondering why this is relevent….but it’s important to understand why we are doing things. Okay everyone?)
While the boys were doing that I was finishing up the minor details of the last layer of styrofoam. There was kind of a lot to do. More tedious stuff. Of course I’m going like a mad man with the saw and sheet rock knife and I wind up nicking myself with the hand saw. Haste makes waste Jim. Luckily I didn’t waste one of my fingers. It was bleeding pretty good. I had Terence get the first aid kit.
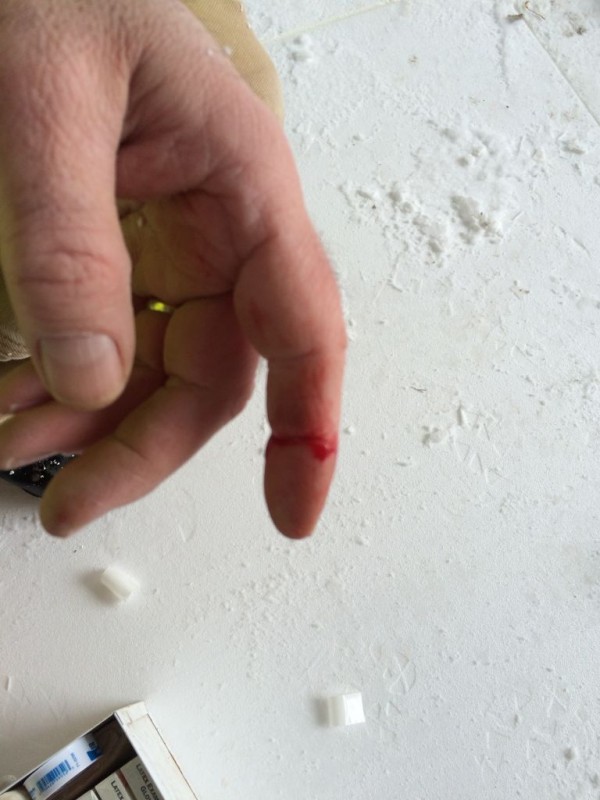
Yes people there will be blood. It wasn’t that bad though. It was more the red blood on the white styrofoam that was bugging me.
Back to work though. So the next step in the procedure was to set up the chairs so we could put the rebar down. I was able to get 2 inch rail chairs for the slab. We’re pouring a 6 inch concrete slab so these are going to put everything at the right height for our pour. Here’s a picture of Terence laying out the chairs.
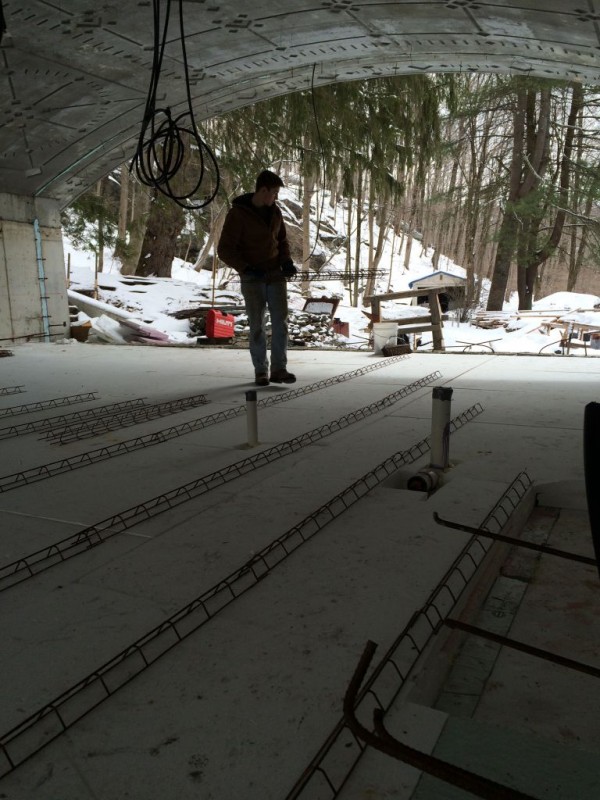
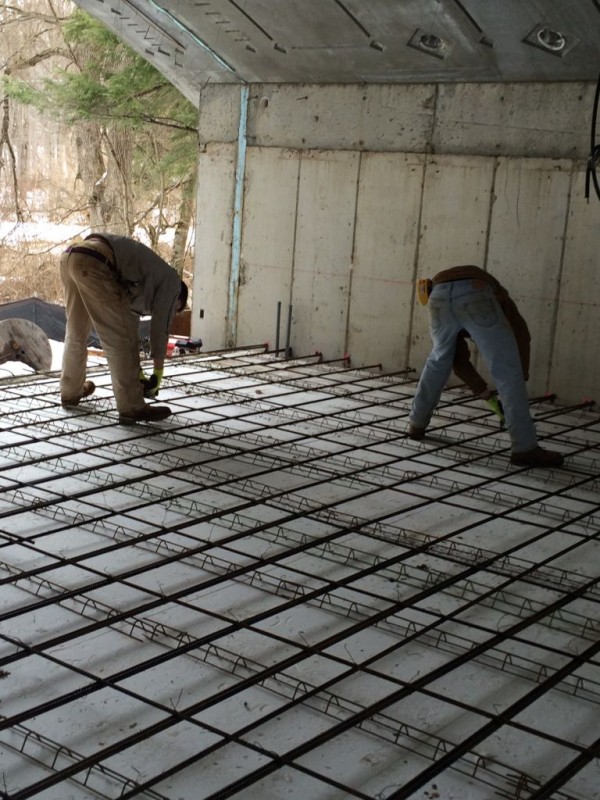
I don’t know if you remember or not but when we did the slab on the roof the steel was a really big deal. Not only was it complicated but it was a lot of hard work as well. This mat went in in about two hours and I didn’t even work on it all that much. Here are the boys working on it.
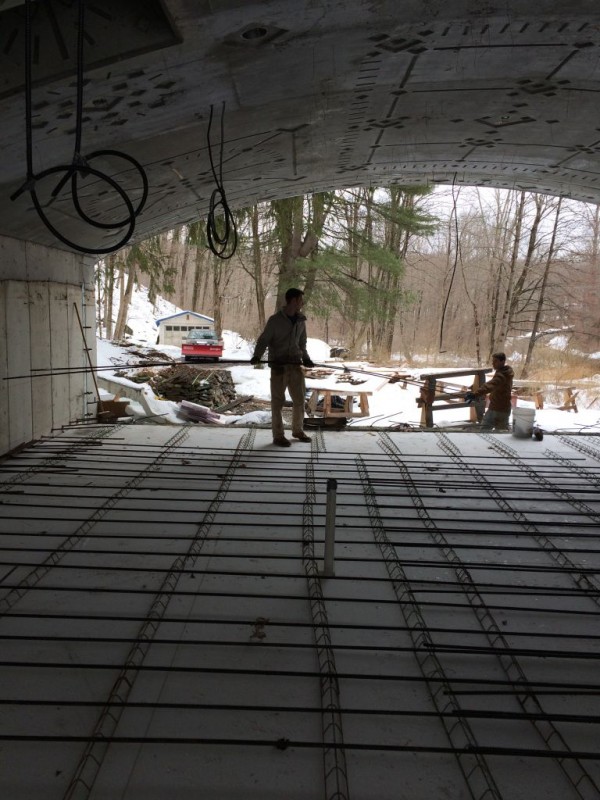
So this is a single mat that we are puttiing in. Not a top and bottom mat like we did on the roof. The main structural element here is the bars that are shown. These bars are #5 rebar at 12 inches on center. These bars, as we spoke earlier about, are spliced with the bars that were epoxied into the wall. This will hold our walls from pushing out once the concrete is poured. The cross steel that will be going perpendicular to this steel is not as significant. It’s supposed to be #3 rebar at 24 inches on center. We used a combination of #4’s and #5’s. Here are the boys tying off the mat.
Tough work if you’re not used to it. As Terence said Sunday, “My hammies are sore!”
Good thing he’s got tough “hammies.”
So as of right now we just have a few items to go before we’re ready for a slab pour. There are a few micellaneous rebar details we have to finish. There’s also about a days worth of concrete form work that I have to do. The last thing to be done is run all the electical homeruns for the panel box as well as any additional conduits we want to put in place. Then we’re ready for concrete.
Hopefully the snow is all but over and we can start getting some good weather to work in.
Sorry the post was so long but there was quite a bit of important info to touch on this week. I’ll be hearing it about the length. Apologies all around.
Just one other quick thing before I go. It is a family fact that Terence happens to be the resident know it all of the family. I guess there’s one in most. It doesn’t help that Mr. Wise Old Owl is usually right. We’re always trying to catch him at fault. So it didn’t help ego wise when he received this letter from Dr. Buzz Aldrin the other day asking him to meet him for some technology seminar in Boston this summer. Pretty cool though. Sounded interesting. Check out the letter.

Terence might be going to infinity…………….and beyond! (But for now we have to deal with his head expanding to infinity and beyond right here on earth!!!)
Enjoy your week!
Jim
I understand about ties/joists in wooden houses, but those are at the top of the wall. Your ties are at the bottom. Is it just because your roof is an arch that ties at the bottom work? Except they aren’t at the bottom of the arch…. Please explain.
Sally! Ah yes, very good question and something even I had a hard time grasping.
The intersection of the wall and roof assembly are designed as a rigid frame. In addition to that this portion of the roof had to be poured monolithicaly with the very top of the wall. The engineer called this out on the design drawings.
So engineering wise what happens is the forces that are being applied to the roof (that is it’s dead load, soil and snow load) are pushing down on the roof vertically. That vertical load travels through the roof and takes on a vertical and horizontal component as it reaches the wall roof intersection. Those forces do not disappear. They are transferred through the wall. The design is such that the roof wall connectivity, if you will, is overdesigned and is designed to resist the bending forces that are being transferred through it. Therefore the horizontal component of the load must be transferred through the wall and into the footing. Hence the need for the ties at the slab level. In other words a chain is only as strong as it’s weakest link. The link at the roof wall intersection is the strongest one.
This structure is designed to be independent of the soil loads that will also help resist that outward force.
The reason for this was the fact that one side of the structure will not be fully buried.If both sides were completely buried the weight that this structure would be able to withstand would be nearly incalculable. This is the beauty of a fully supported arch.
I could go on for quite some time about this but the engineer who designed this is a genius. I hope I’ve answered your question.
Thanks for the interest and I hope all is well with you and your family!
Jim
Ahhh. So, if both vertical walls were buried you could put almost unlimited load on the arch. But since this wall is not buried it needs reenforcement, and the only place to do that is at the floor.
I’m glad you think your engineer is a genius — always good to have someone appreciate your work.
Sally
Hi Sally! Good to hear back from you again. It looks like I’ll be working in the city this weekend but if I get the chance I’ll try and take a couple of pictures and describe what is going to happen with the soil when we backfill. What I’ve previously described will become apparent.
All the best!
Jim
Jim,
Enjoyed reading this week’s edition as I do every week – learned a lot. They are going to replace/repair the 300 balconies in the condo I’m at, so I’m learning much about concrete and rebar!
Mike
Hey Mike! Glad to hear from you as always. Just be careful when they’re doing the repair work. Things fall hard and fast from high places.
Jim