Hello again and welcome to another installment of the Hobbit Hollow construction blog! Glad you could make it.
Hmmm. Mira Drain. What in the heck is Jim talking about now? We’ll get to that shortly…a few things before we begin.
So my mind is really racing now. There is work on multiple fronts at the house and we really have to sit down and choose what direction we need to go in. The critical factor here is Tweedle Dum and Tweedle Dee. Aka Ethan and Jude. In no particular order I might add. This being a Hobbit House construction blog you would think I’d have picked out some sort of Middle Earth Hobbit-y kind of name for each one of them by now. It’s just not happening though. So the Tweedle brothers will have to do for the time being.
So the Tweedle brothers need to keep working over at the house during the week. Like I was telling Jude the other day, there aren’t any YouTube videos on how to do some of this stuff so I have to show them the order of events. In the case of the exterior insulation and Mira drain I wasn’t sure how to do it either. So I figured that this would be a good weekend to figure out how to install this stuff because it is pretty labor intensive and it will definitely keep them going for a day or two. Maybe longer.
Of course Saturday morning I’m up at 430. It’s like automatic people. I wake up at 4 during the week and I just can’t seem to shut it down the way I would like to on the weekends. Needless to say I got up and headed over to the house. There’s a bunch of little odds and ends stuff I wanted to knock out before the boys came over. So I’m driving over there and boy do I need a coffee. I pull up to Quick Stop and they’re closed. Darn it. Now I have to back track and go out of my way to Dunkin’ Donuts. So I pick up my medium coffee, extra milk and extra sugar and try to take a sip. They changed the lids! Why would you change the lid of a coffee cup? I mean whoever came up with this design is probably not a human. You couldnn’t even drink out of it. The sippy part is practicaly in the middle of the lid and when you sip you have to force your lower lip into this trough. I don’t even know how to explain it. Totally ridiculous. After you take a sip your lower lip is formed into this little mini wedge. News Flash! Aliens have infiltrated the coffee cup lid design teams of the world….Beware!
So now we have that to worry about. For the record I didn’t finish my coffee…. and I’m trying to massage my lower lip into what it used to look like.
One of the things that I wanted to set up was a cutting table for the waterproofing. I sort of neglected that part of the waterproofing detail when I told the boys how to install the waterproofing. Just cut 6 foot lengths and have at it. Well it’s a lot easier to cut waterproofing on a plywood table that’s set up right. Let me show you what I did.
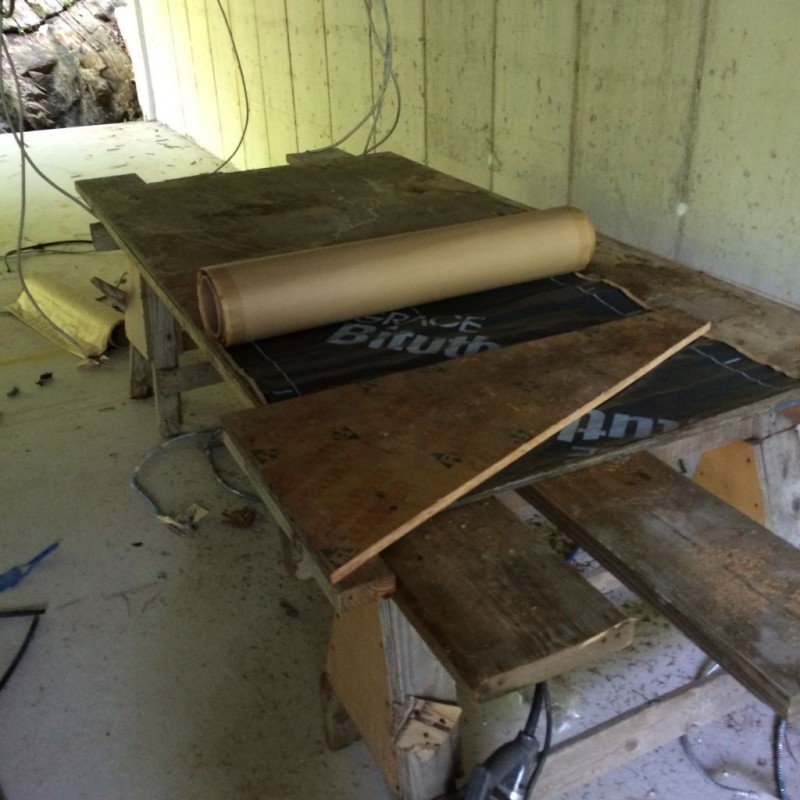
Pretty simple. Just a sheet of plywood nailed to a couple of planks. I also made a cutting jig. The idea behind the cutting jig is you mark the length of the piece you want to cut on the side of the plank. Then you slide the jig along the edge of the plank and square it up to your mark. Hold the jig down and cut along the edge of the jig with a sheetrock knife to get a nice straight cut.
One of the other items I had the boys take care of during the week was prep for the stone fascia ledge. Hmmmm. What? Yeah getting a little ahead of ourselves here but this particular item has to be taken care of before we can backfill around the house. Hobbits like to use a lot of different materials in constructing their homes so we’ve got to put a little stone in there as well. So if you go way back to the archives, there was a blog where I talked about adding rebar to the footing to take care of the stone ledge. (The ledge is really just an additional concrete knee wall to sit the stone on that’s all.) Well, there’s a little more to it than that but I’ll get into that when we start the ledge knee wall. So I had them clean off the footing and straighten out the rebar so we can cut it to the correct height. (Which I had Terence do on Saturday, by the way.) Here’s a picture of the footing with the rebar straightend out and the threaded rods installed for securing the wall.

I spray painted the yellow marks on the rebar so Terence could cut them to the right height.
So before we can start insulating the exterior walls we have to make sure our waterproofing details are done correctly. This was the last item I needed to take care of. The transition from the vertical exterior wall to the roof at the retaining wall curb is our weak spot. (As far as water infiltration is concerned.) What you kind of have to do is look at it like a step flashing detail on a conventional roof. Work up the roof and layer pieces of waterproofing as you go. What’s really nice about the peel and stick is if you make a mistake you can just glue down another piece and/or start over on top of what you did. Not that you want to go about it like that but sometimes when you are putting this sticky stuff on you don’t get it on the way you wanted to. Just add a piece. Check it out.

This is a good example of what I was talking about. I made a poor cut line here as you can see. So I just added a piece on top of the one that’s there to finish it off nice. Oh yeah, the key with this part of the installation is to work with smaller pieces and to peel just a bit of the back paper off the peel and stick. Once you have it where you want it peel the balance of the paper off slowly and press it in.
So I did this all before breakfast. It’s blueberry season. Man, the blueberry pancake I had was awesome. Just do it. Make yourself one. You won’t be disappointed.
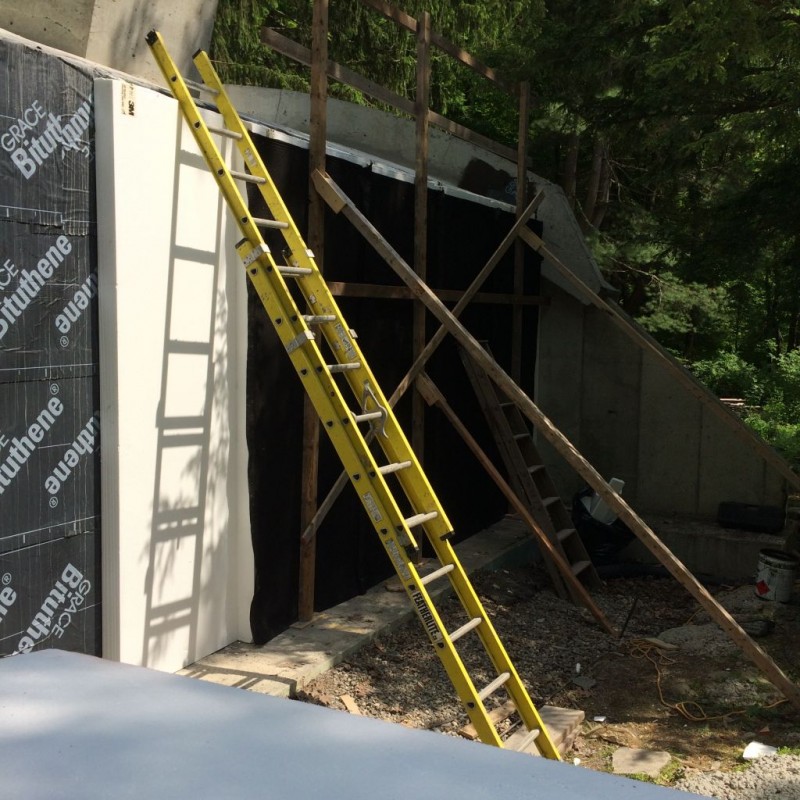
So Tweedle Dum and Tweedle Doo show up at like 10:30. (It’s tough playing Xbox Live into the wee hours of the morning.) So I set them up with a bunch of chores right away. One of which was clean up. The other of which was dismantling the protection we had installed last weekend. Now this is a little dangerous because you are working on the very edge of the roof and it’s a 10 foot fall. Always proceed with caution. I just had them take out the 2×4 on the edge of the roof. It’s going to be in our way as we work going forward. Here they are proceeding with caution.

Boy, there really is a lot to talk about. The boys are going to complain the post is too long. Hmmm. Let’s just press on for now.
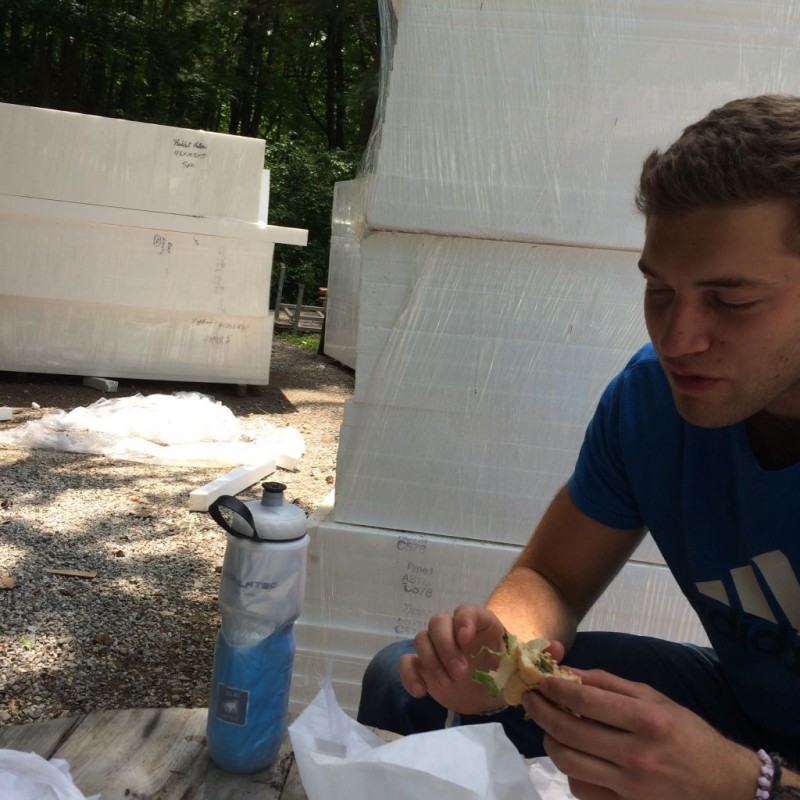
So Terence, Jude and I are having lunch and I notice that Jude has the water bottle that the Long Islander got him as a gift. So we’re all sitting there and I say, “Does that keep it cool?” Meaning, does the insulated water bottle that the Long Islander got you as a gift keep the water cool for very long. Jude turns around and starts touching the insulation that’s behind him. Like feeling it. I look at Terence and he looks at me and the bubble over both of our heads is, “What in the name of God is he doing?” Then Jude turns around and says, “I don’t know?” There really is no explanation for this one. It came out of nowhere. I wonder if he had a Dunkin Donuts coffee with one of those strange alien designed lids before he came over?
So as I was saying the main task for the day was insulation/mira drain install. I had some sketches I made and a rough idea of how I wanted to go about doing things but as I’ve said in the past once you start sometimes things become a bit more obvious. Which they did. The key really is the corner piece which has to be cut to fit. Once that is done the other pieces fall into place quite easily. You just have to custom cut the top only.
So the procedure was pretty simple. Cut the top of the styrofoam, lean it up to the wall, use 3m 8067 tape to hold the top to the foundation and tape it to the adjacent piece. Do the same with the second layer of styrofoam making for a grand total of 10 inches of EPS insulation. That’s R-50 people with no thermal bridging for anyone keeping score out there. After you have the second layer on cut a 10 foot length of Mira drain and use 16 penny double head nails to secure that to the styrofoam working from the bottom up. (A two man job. One man holds the roll of mira drain and aligns it with the styro and unrolls it as the second man secures the drain with the nails.)
So what is Mira drain exactly and why are we using it?
Just the short version Jim. First a picture for clarification purposes.
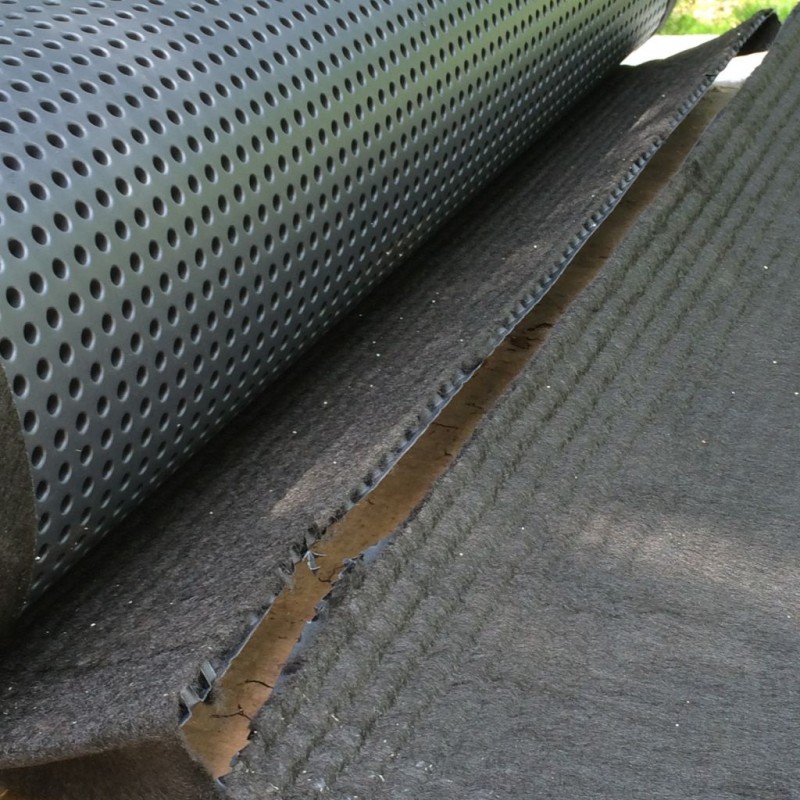
So mira drain is a drainage plain for groundwater. As the ground absorbs water from a rainstorm it travels through the soil and heads for your foundation wall. Instead of getting to your foundation wall it passes through the filter fabric on the Mira drain and falls vertically down between the air space between the filter fabric and the plastic dimpled backing of the Mira Drain to your footing drain buried in crush stone. If you look at the picture above you can see the cutaway section and what it’s going to do for you.
So. So the whole hobbit house will have an insulation layer, with Mira drain on top of it. Very important for the long term here people. Gotta have the proper drainage. In fact when all is said and done I’m hoping that water will never even have a chance at reaching our waterproofing at all. That’s the goal here. Set the house up so that the waterproofing is essentially not needed. It’s just the ultimate factor of safety.
Just another picture or two.
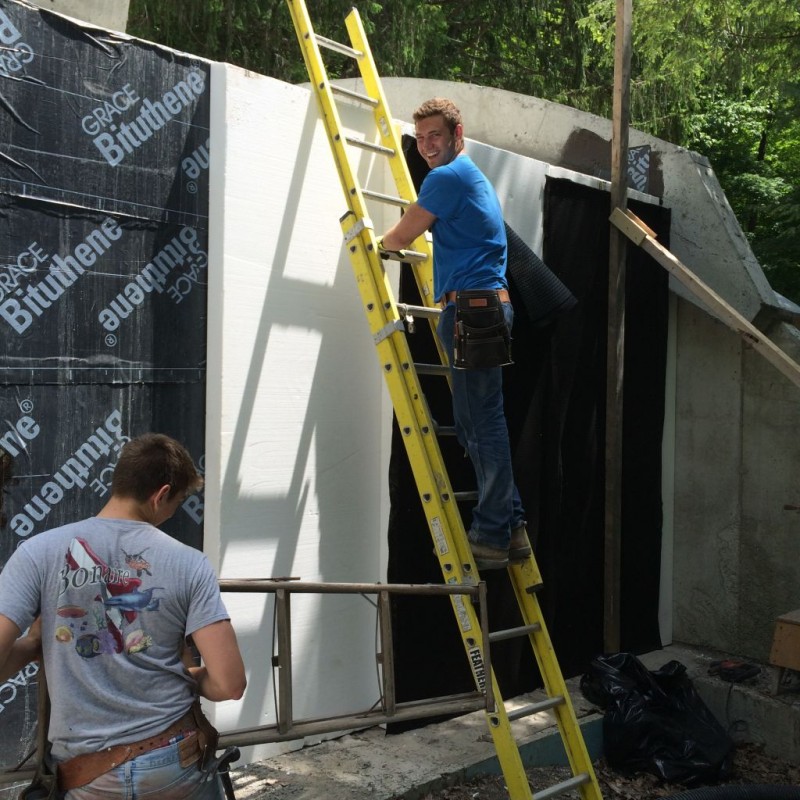
What’s with the smile for the camera stuff? Keep working!
Off to Jude’s right you’ll notice a 3×4 secured to the wall. It’s braced at the top with another 3×4 and secured to the footing at the bottom. This is the start of our fall protection system for the roof. In order to continue the waterproofing and the insulation up there we need a safe work zone. This is what I came up with. Check out the first part of the installation.
So as we install the styrofoanm and the Mira Drain we’ll also keep going with this protection system. Once we’re done we’ll be all set to start on top!
Oh yeah! We are moving right along now people!
Have a great week and check those coffee cup lids!
Jim
You could have flowers on your roof! What fun! Chives, Asters, Columbine, Bluebells, Hairy Beard-Tongue, wild Strawberries, Black Eyed Susan will grow in shallow soils on roofs. Wouldn’t that be fun, to look up and see flowers?
Yes Sally there’s a lot you can do with a Hobbit house roof! I think I’ll keep it simple at the start though and see how things go. I’m hoping to finish up some odds and ends this weekend but the weather forecast isn’t to promising.
Glad you’re still hanging in there with me though. I hope all is well on the home front.
Thanks for writing!
Jim
Remember those plants you showed us last year? The ones I said were probably what was left of someone’s garden? How are they doing? Hobbits do enjoy gardening you know.
Oh boy. One of my fatal flaws is my poor memory. It’s going to take me a while to find that picture. If I do find it I will definitely check it out.
Agreed. Hobbits do love good tilled earth and a house garden. I’m definitely going to need some help in the gardening department. Mostly shade at the Hobbit house. Put that in the computer for next spring. Hoping to be working on the final touches on the outside by then.
Thanks for writing Sally!
Jim
Shade limits your gardening options, especially with edibles. Fruit brambles (raspberries, blackberries) and bushes (blueberries) don’t mind a bit of shade, but things like tomatoes and squash want all the sun you can manage. What I remember seeing from last year were what I guessed to be daylilies and hybiscus which both like sun too (maybe that’s why they aren’t doing well?) They were near one corner of the house I think.
I thought you were Radagast the Brown? I guess you’re going to be my Samwise Gamgee the Gardener as well. The first issue is what do I put on the roof for ground cover. I have in my head pachysandra. It’s one of the only things that I’ve ever planted that did well.
Once we cover up this roof we need something to grow pretty quickly. Let me know what you think!
Take care,
Jim
For roofs you need a plant that 1) can handle long dry spells and 2) full sun without getting too tall. Sedums are often the choice, but I don’t know how well they handle cold. I don’t know how well pachysandra will handle dry conditions – it might be fine, but I have no first hand experience. Research! (what fun!)
Hmmm. It very well could be the mixing of the cereals. Something tells me that Jude is pre-occupied for another reason though. His thoughts constantly drifting to the Isle of Long….;)
I think mixing cereals is having negative side effects on Jude!
There are quite a few things having negative side effects on Jude. Breakfast cereals just being one of them!
Have fun camping!
Mr. C